 My seven year old is obsessed with Minecraft. I hear a lot of “Mom did you know, in Minecraft……” which is about where I zone out because I really know very little about Minecraft. However, I am interested in expanding upon his interests. I think it is great that he is so passionate about something, even if it is based on a video game. Instead of incessantly playing video games I want him to build on the creative problem solving skills learned in Minecraft, and apply those skills to other things. Continue reading
Sewing
Horsing Around
 Sunday morning my oldest has drawing classes, and he was refusing to go recently because he was “too busy” pretending to be a cowboy. He and his brother were both galloping around wearing cowboy hats. After I promised that, he could return to playing cowboys after drawing he dropped the hat and off we went. As soon as we returned, I was roped into their pretend play.
“Where are your horses?” I asked
“We don’t have horses,” they said
“Do you want horses?” I asked
“YES” they said
“Where do we get some?” they asked
“We make them,” I said
On the fourth day of Christmas
On the fourth day of Christmas four little monkeys came to play. I made a batch of these last year to give as gifts, and these little guys stayed to live with us. There are four of us and four monkeys so they kids play family with them. Because I made them all a little different they fight over who has stripes and who has dots.
Here is the full post with instructions to make your own.

On the third day of Christmas…
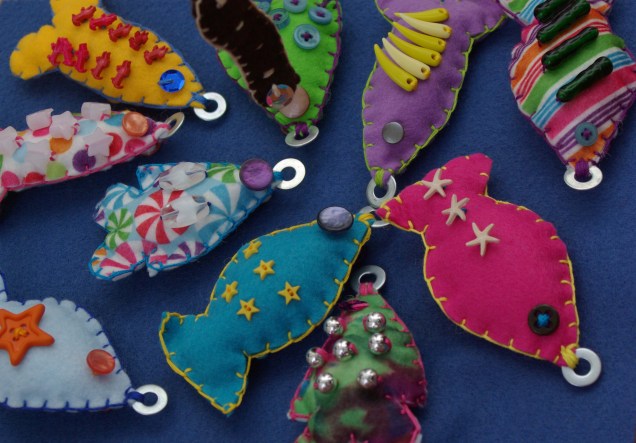
This is one of my favourite things that I have made for the kids. I made these 3 years ago when my oldest was 3. Surprisingly they are still all intact. On the third day of Christmas we went fishing. Link to felt fish.
King of the Castle
 Whenever I get out crafting supplies one of my kids asks what I am making. When I told my oldest that I was making crowns to give as birthday presents for a couple of upcoming parties, he requested one. I had a crown pattern drawn with stars on it and when I showed him he requested more points and to change the stars to diamonds. So this project was designed by my oldest and sewn by me. He is my biggest critic, greatest source of inspiration and the king of the castle. At least one of the kings of the castle, my youngest is challenging him at every step. No one around here wants to be the dirty rascal.
My youngest is yelling to the neighbourhood “I’m the king of the castle you are the dirty rascal”. He is also sporting his superhero cape and his love shirt.
If you are interested in making a crown here is a pattern. If you are interested in buying one here is a link to my Etsy store.


A Mustachioed Snake
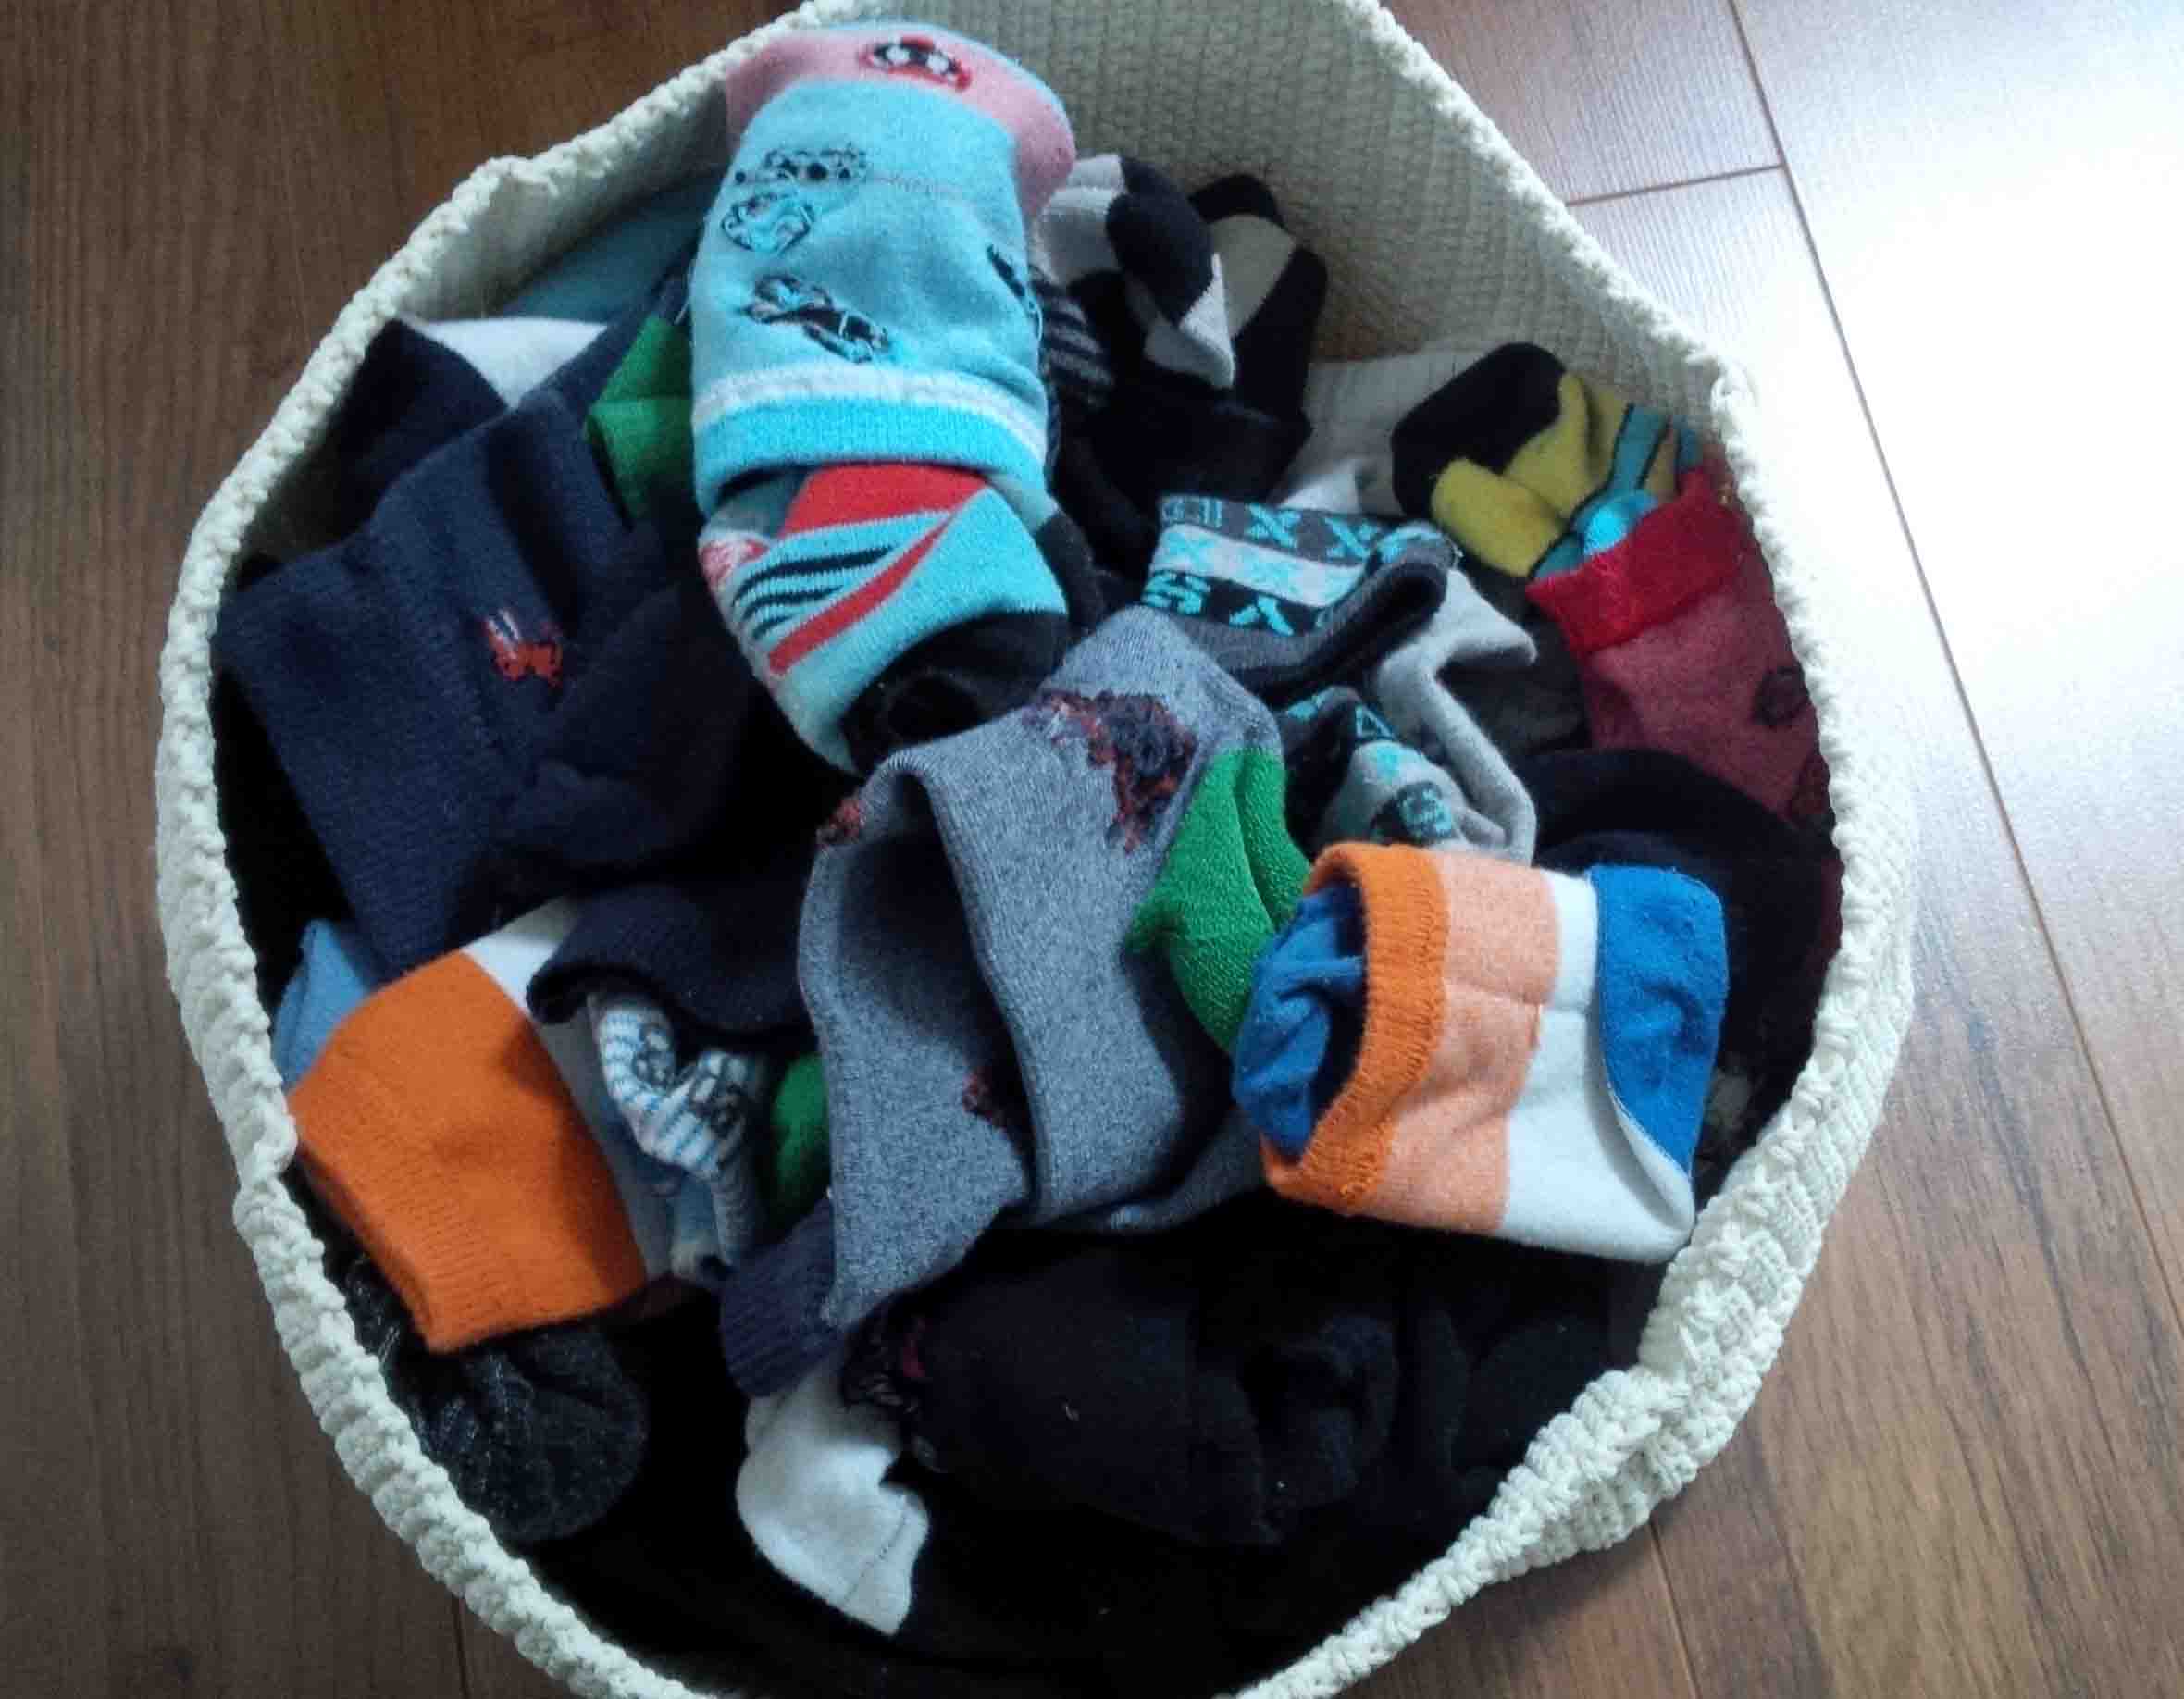 There are two people in my house that love to wear socks, and there are two of us that don’t. My husband and oldest son are the sock wearers. They seem to go through socks so quickly. I am not a fan of socks, and only put them on with sneakers, or in the winter. The rest of time I am barefoot, as is my youngest. I rarely wear out a pair of socks, usually the elastic goes before I wear holes in them. This is not the case for our resident sock wearers, they are constantly wearing through socks. I have been saving them because it seems such a waste to throw them out.
I am also an avid recycler. Pants, shirts, doors, milk jugs, new socks and now even the holey old socks in our house gotten a new lease on life. Meet our newest house guest, “Sunday” the sock snake. He is constructed of mainly of my husband, and eldest son’s holey socks. He is named Sunday because one of the pairs of socks said Sunday on the bottom, so I though that it was fitting. He is also the only snake that I know that has a mustache, or many mustaches.


If you are interested in giving your old socks a new lease on life, check out this tutorial from Grosgrain. I made a couple of alterations to the tutorial with the main one being using quilting batting instead of stuffing. I learned when making sock monkeys that it’s really hard to get the socks stuffed with out having big lumps, so for the snake I used batting. Here are some pictures of my battle with the batting. It was a full body workout to get Sunday stuffed. Now I will need to make a second one because I still have a pile of holey socks.


Crafty Mommas – Monkey Making
This past Sunday I hosted a monkey making party. I really enjoy making things and I want everyone to know how to make things too which is why I invite people over and attempt to teach them. I say attempt because I realized this weekend as I tried to show someone how to sew a specific part of the monkey that I am not the best crafting instructor. I think that it is mainly because I have been making things for so long that I don’t even realize what I am doing or how I am doing it. When Jen asks me how I sewing a specific part I don’t even know how to explain, I am just sewing. Sewing is so natural to me that I don’t question what I am doing or how I am doing it anymore, I am just sewing. This isn’t particularly helpful but I am at least aware now, and next time I might be able to explain a little better. Here are some of my lovely friends crafting their monkeys. They look super intense but really we had fun.


Seriously Don’t We Have Enough Pillows
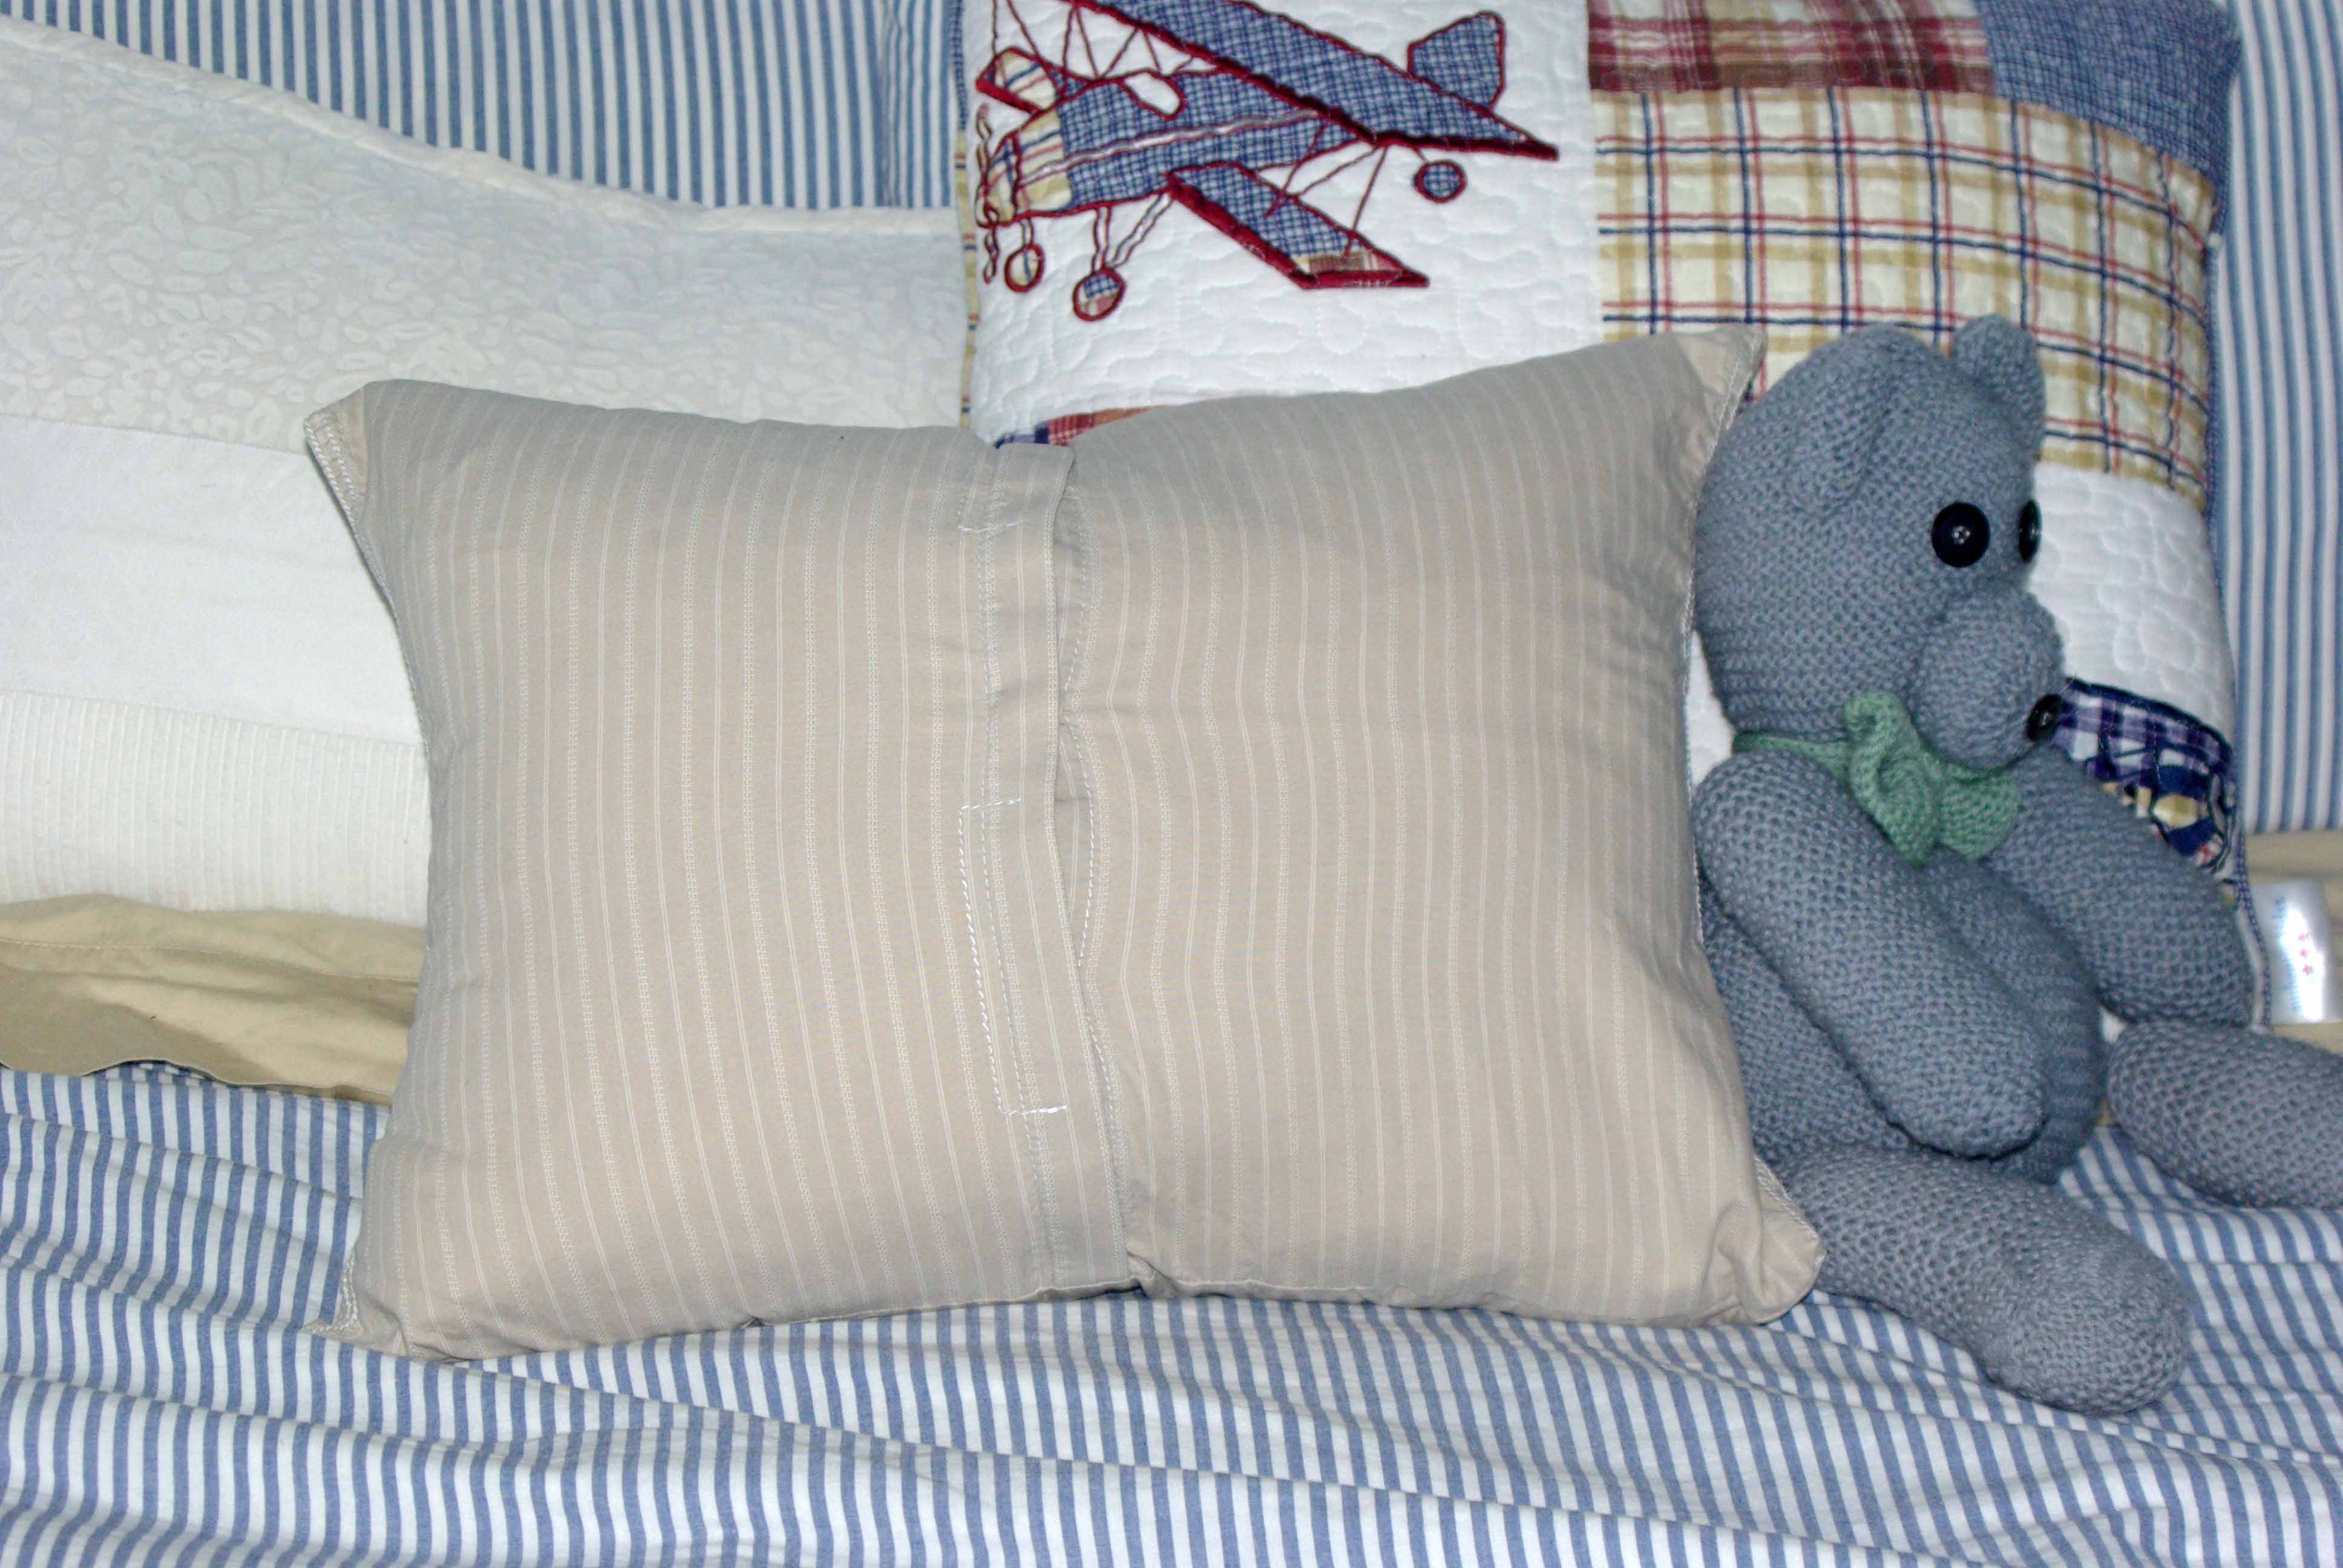 I had my sewing machine out last night, and no good can come of that. I have no idea why I think it’s such a big deal to get out a sewing machine, but once I have it out I must make those projects that I have been planning that require it. A while ago I saw a picture of a pillow made of a man’s dress shirt. My thoughts after seeing the picture were a little morbid, I though what a great idea for someone who has just lost their husband, partner, or loved one. It doesn’t have to be quite so morbid though, maybe it would be useful if you are in a long distance relationship, or have a partner that travels a lot, or maybe I have totally lost my mind. Or for the environmentalist, what a great way to recycle clothing. I will leave the judgement up to you. My husband’s comment was “Seriously don’t we have enough pillows”. He does have a point I couldn’t argue with, but seriously what’s one more? In case you can’t figure out which one is the dress shirt pillow in the picture above, it’s the beige one. It is a little boring, but everything can’t be flashy.
On the bright side, this was the fastest easiest pillow I have ever made. And FREE, who doesn’t love free.
Step 1. Start with a men’s button dress shirt, I asked my husband nicely and he gave me an old stained one. That’s true love, isn’t it.
Step 2. Iron the shirt (if you are lazy, just iron from the arm pits down)
Step 3. You do need a pillow form, or an old pillow you want to recover. Put the pillow into the shirt and check the size. For the one that I made I used a FJADRAR 20″x20″ pillow from IKEA. The instructions below are based on the 20″ pillow form and a men’s medium dress shirt.
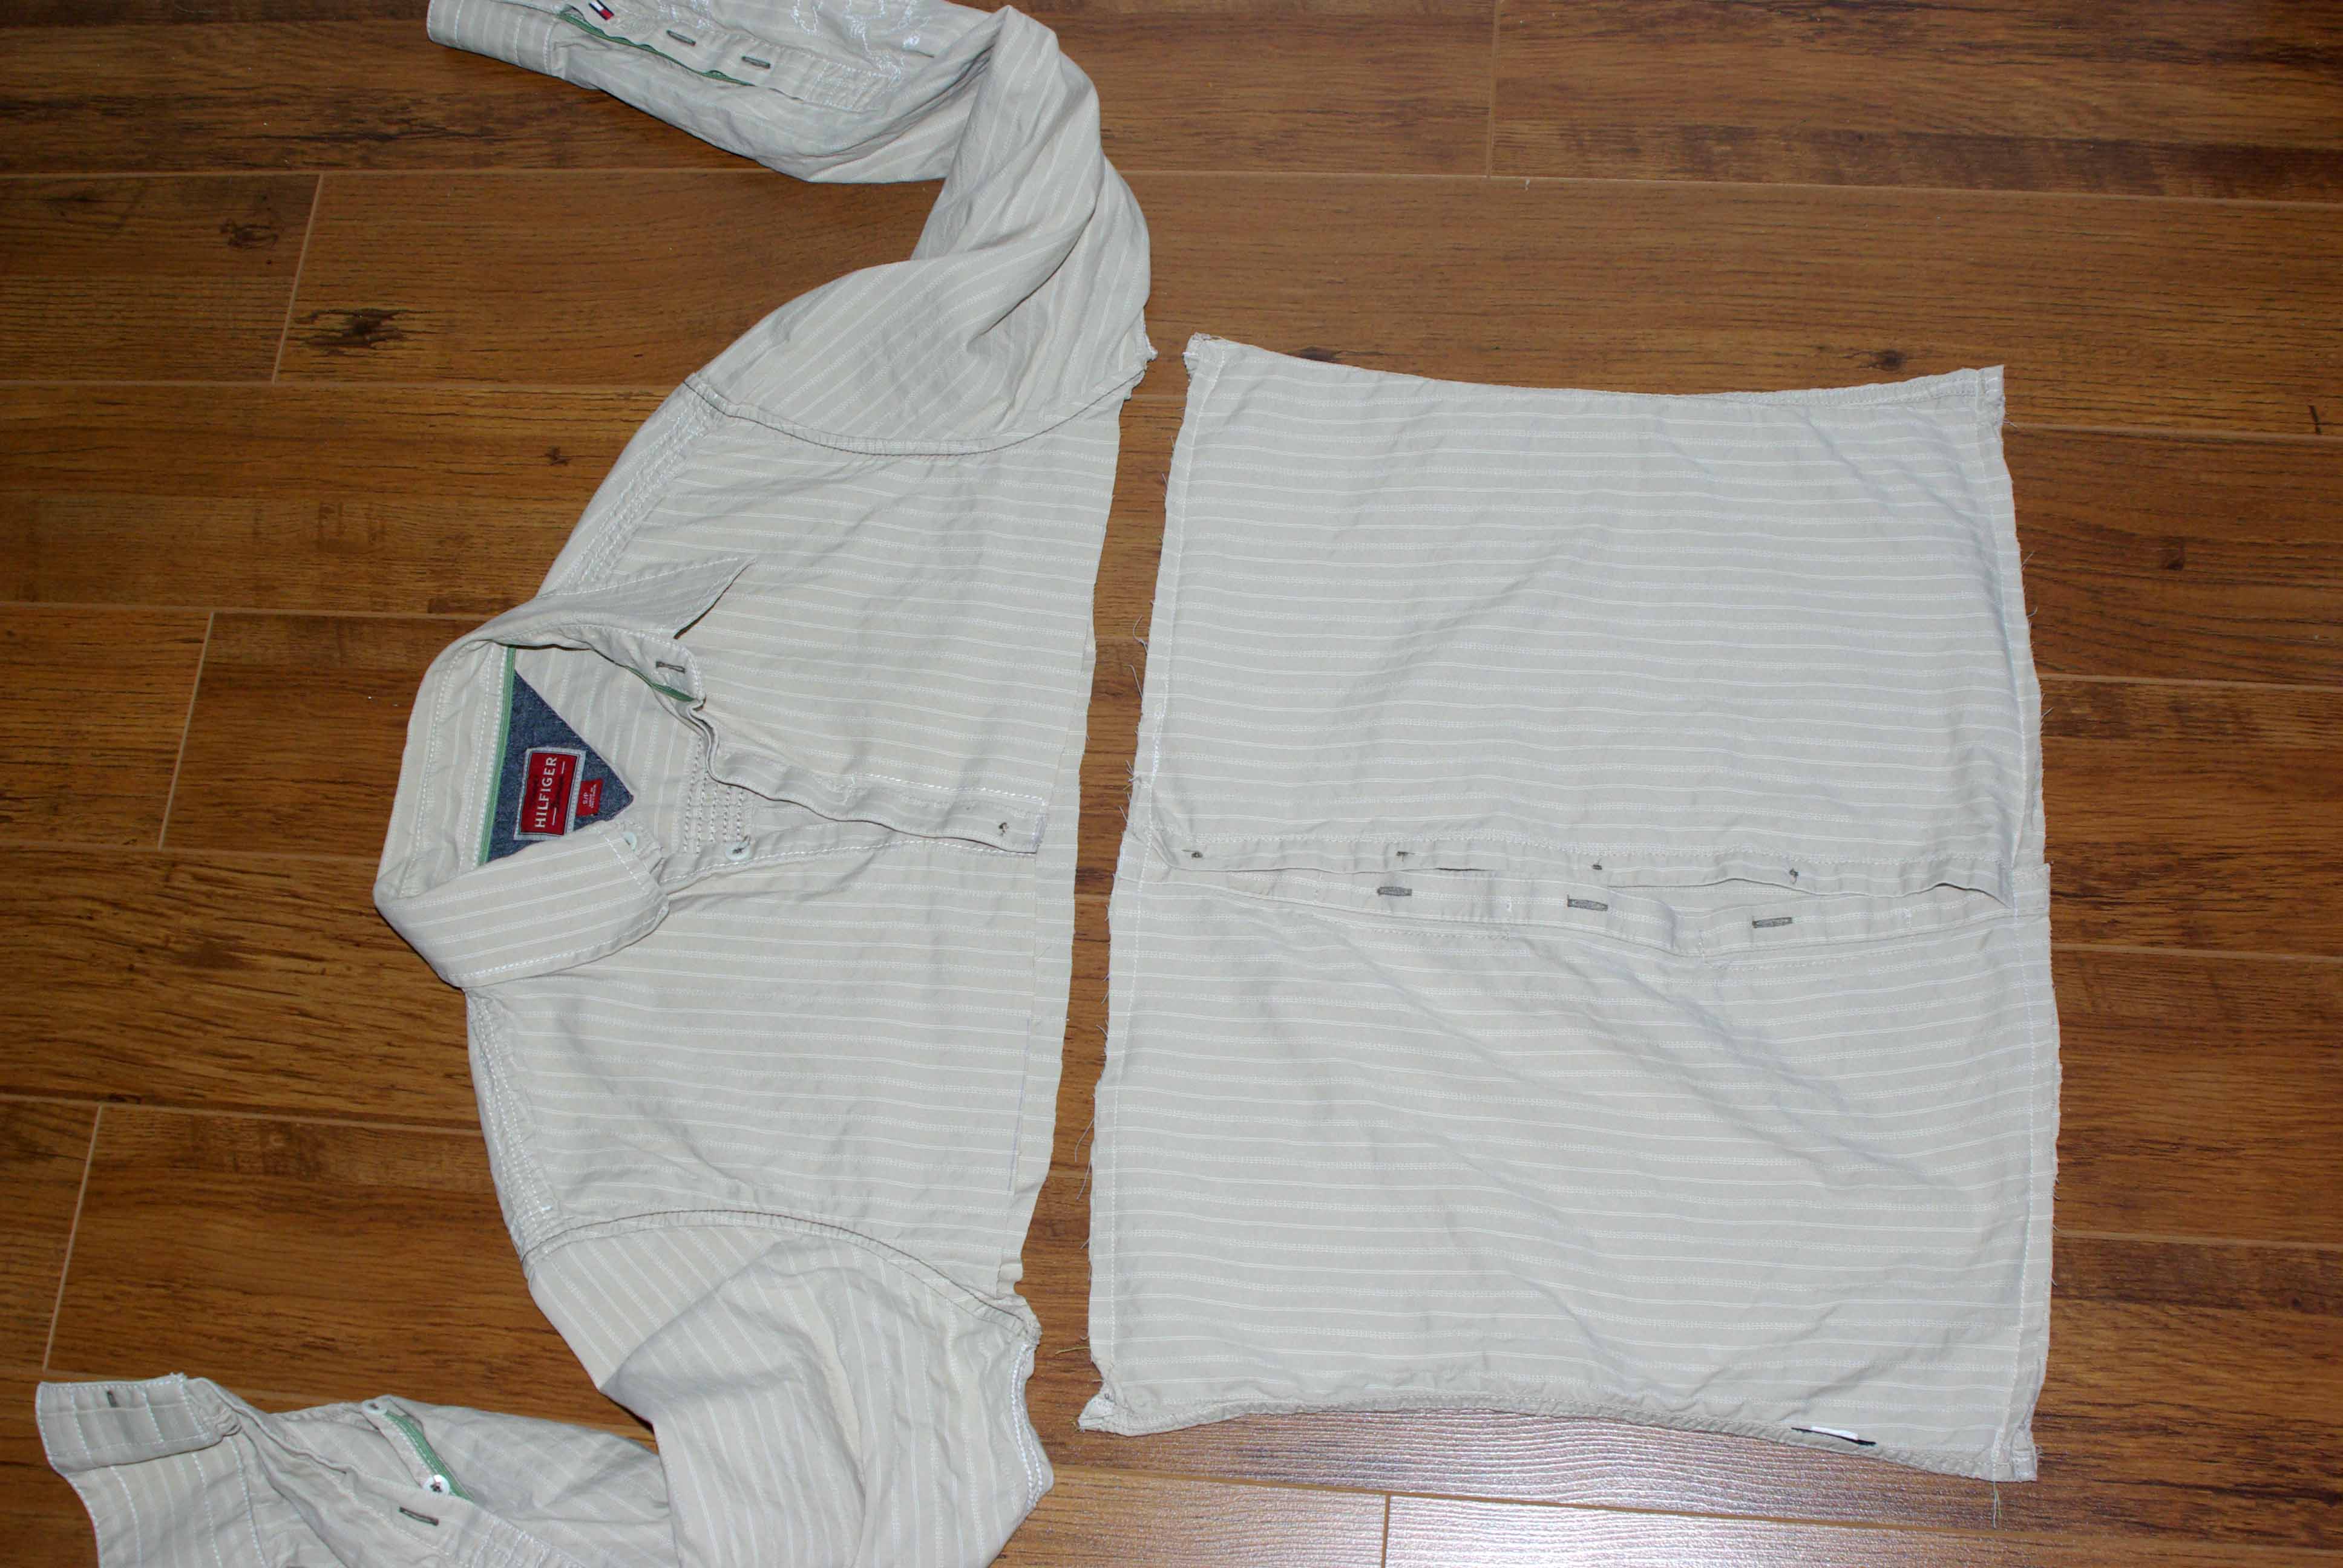 Step 3. Lay the shirt on a flat surface and using a straight edge mark a line from arm pit to arm pit, you can use chalk to make a line, or pencil/pen lightly. If you want to get super fancy, you can mark the cut lines to make sure the button’s are symmetrical. Cut along the line you marked.
Step 4. Trim the bottom of the shirt to be parallel with the line you just cut. All you want to do is square up the bottom edge, usually the bottom edge of dress shirts is not straight.
Step 5. With all of the button’s fastened, turn the piece of the shirt you cut off inside out. Pin the 2 open edges. Sew the edges closed.
Step 6. Open the button’s. Stuff with the pillow and fluff it up.
So now what do we do with the rest of the shirt? Great question, I will show you how to make something with the sleeves tomorrow. Crack out the wine, you are going to need it.
Keep sewing, crafting & creating.
Snakes & Ladders


It rains in Victoria a lot, I am not complaining. I would rather rain than snow, but it is a little hard for me to take the kids out to play in the rain. So we play inside, and this is one of the games that I made to keep my five-year old occupied. Snakes & Ladders is such a simple game to play which introduces numbers up to 100 and counting.
I got the idea from an episode of Steven & Chris and following their instructions I made this giant playing board. http://www.cbc.ca/stevenandchris/life/diy-snakes-and-ladders
I have copied their instructions below and changed their instructions a little bit based on my experience making the game. I had issues opening the PDF’s needed to print the transfer papers on their site so I made my own.
1. Start by purchasing some white iron on transfer paper for white t-shirts from an office supply store and a drop cloth from the hardware store (paint department). Don’t purchase the generic brand transfer paper, the quality isn’t great and it peals off when playing/walking on the game. Go for a quality brand, and one meant for canvas bags if you can find it.
2. Next, download snakes and ladders to print file with the game board pieces and print them on your transfer paper; you will need 25 sheets.
3. Trim off the excess colour/squares from the transfer paper using a straight edge and exacto type knife. Lay the transfer papers out face down. (download our snakes & ladders template to help you keep organized) I wrote on the back of each one so that I could tell the order when they were face down. Layout all of the sheets and measure how large you should cut/hem the drop cloth.
4. Hem the drop cloth. You might want to layout the transfer papers on the drop cloth at this point to make sure that everything fits. Measure the center of the drop cloth and start with the transfer paper with numbers 56/55/45/46.
5. Working from the center out iron on your transfer sheets as per their instructions. This process may take two to three minutes per page, but is absolutely worth it!
6. Let cool, and peel back the iron on paper to reveal your game pieces.
7. We purchased snakes from the dollar store and created ladders using dowel and twine (also from the dollar store), but use your imagination here — this is meant to be fun. We use trains or cars as the pieces you play with.
Keep playing, creating and counting.
Shower Curtain Pillows


I am outraged at the price of fabric these days. I don’t know if it’s worse here because I live on an island where most things are more expensive, or if fabric is expensive everywhere. Sometimes it’s cheaper to buy sheets, curtains or clothes for their fabric content, sounds ridiculous but it’s so true. These pillow covers were made from a fabric shower curtain which was on sale for $0.97, got to love IKEA. The other benefit of sewing pillow covers from shower curtains is that they come with button holes. I have no idea how to sew button holes with a sewing machine, but it seems complicated. This fabric had a letter pattern on it which I thought would be great for the play room, and with easily removable machine washable covers at less than $0.48 each how could I go wrong?
To make these pillows I laid out the shower curtain, and placed the pillow forms on top, centering the button holes so that I had an even number per pillow, and wasn’t cutting through the middle of one. I cut the shower curtain on either side of the pillowform leaving enough width for the seams on the side. I wrapped the fabric around the pillow over lapping the short ends by a couple of inches and cut it, this is where the buttons will be sewn on, leave enough length to hem the short end. You should now have a long rectangle piece of fabric with button holes at one end. The fabric should be a little wider than the pillowform and about 2.5 times longer than the pillowform. Hem the short edge. Lay out the rectangle right side up, fold the button-hole end towards the center (right sides together), fold the other end over the button-hole end (you shouldn’t be able to see the button holes, measure the folds to fit the pillowform. Sew up the 2 sides. Turn inside out and check the fit, the button holes should be on the outside flap. Sew on the buttons to line up with the button holes, and stuff with the pillowform. Using a shower curtain to make a removable pillow cover is so much easier than sewing in a zipper and just as easy as making an envelope style cover.
