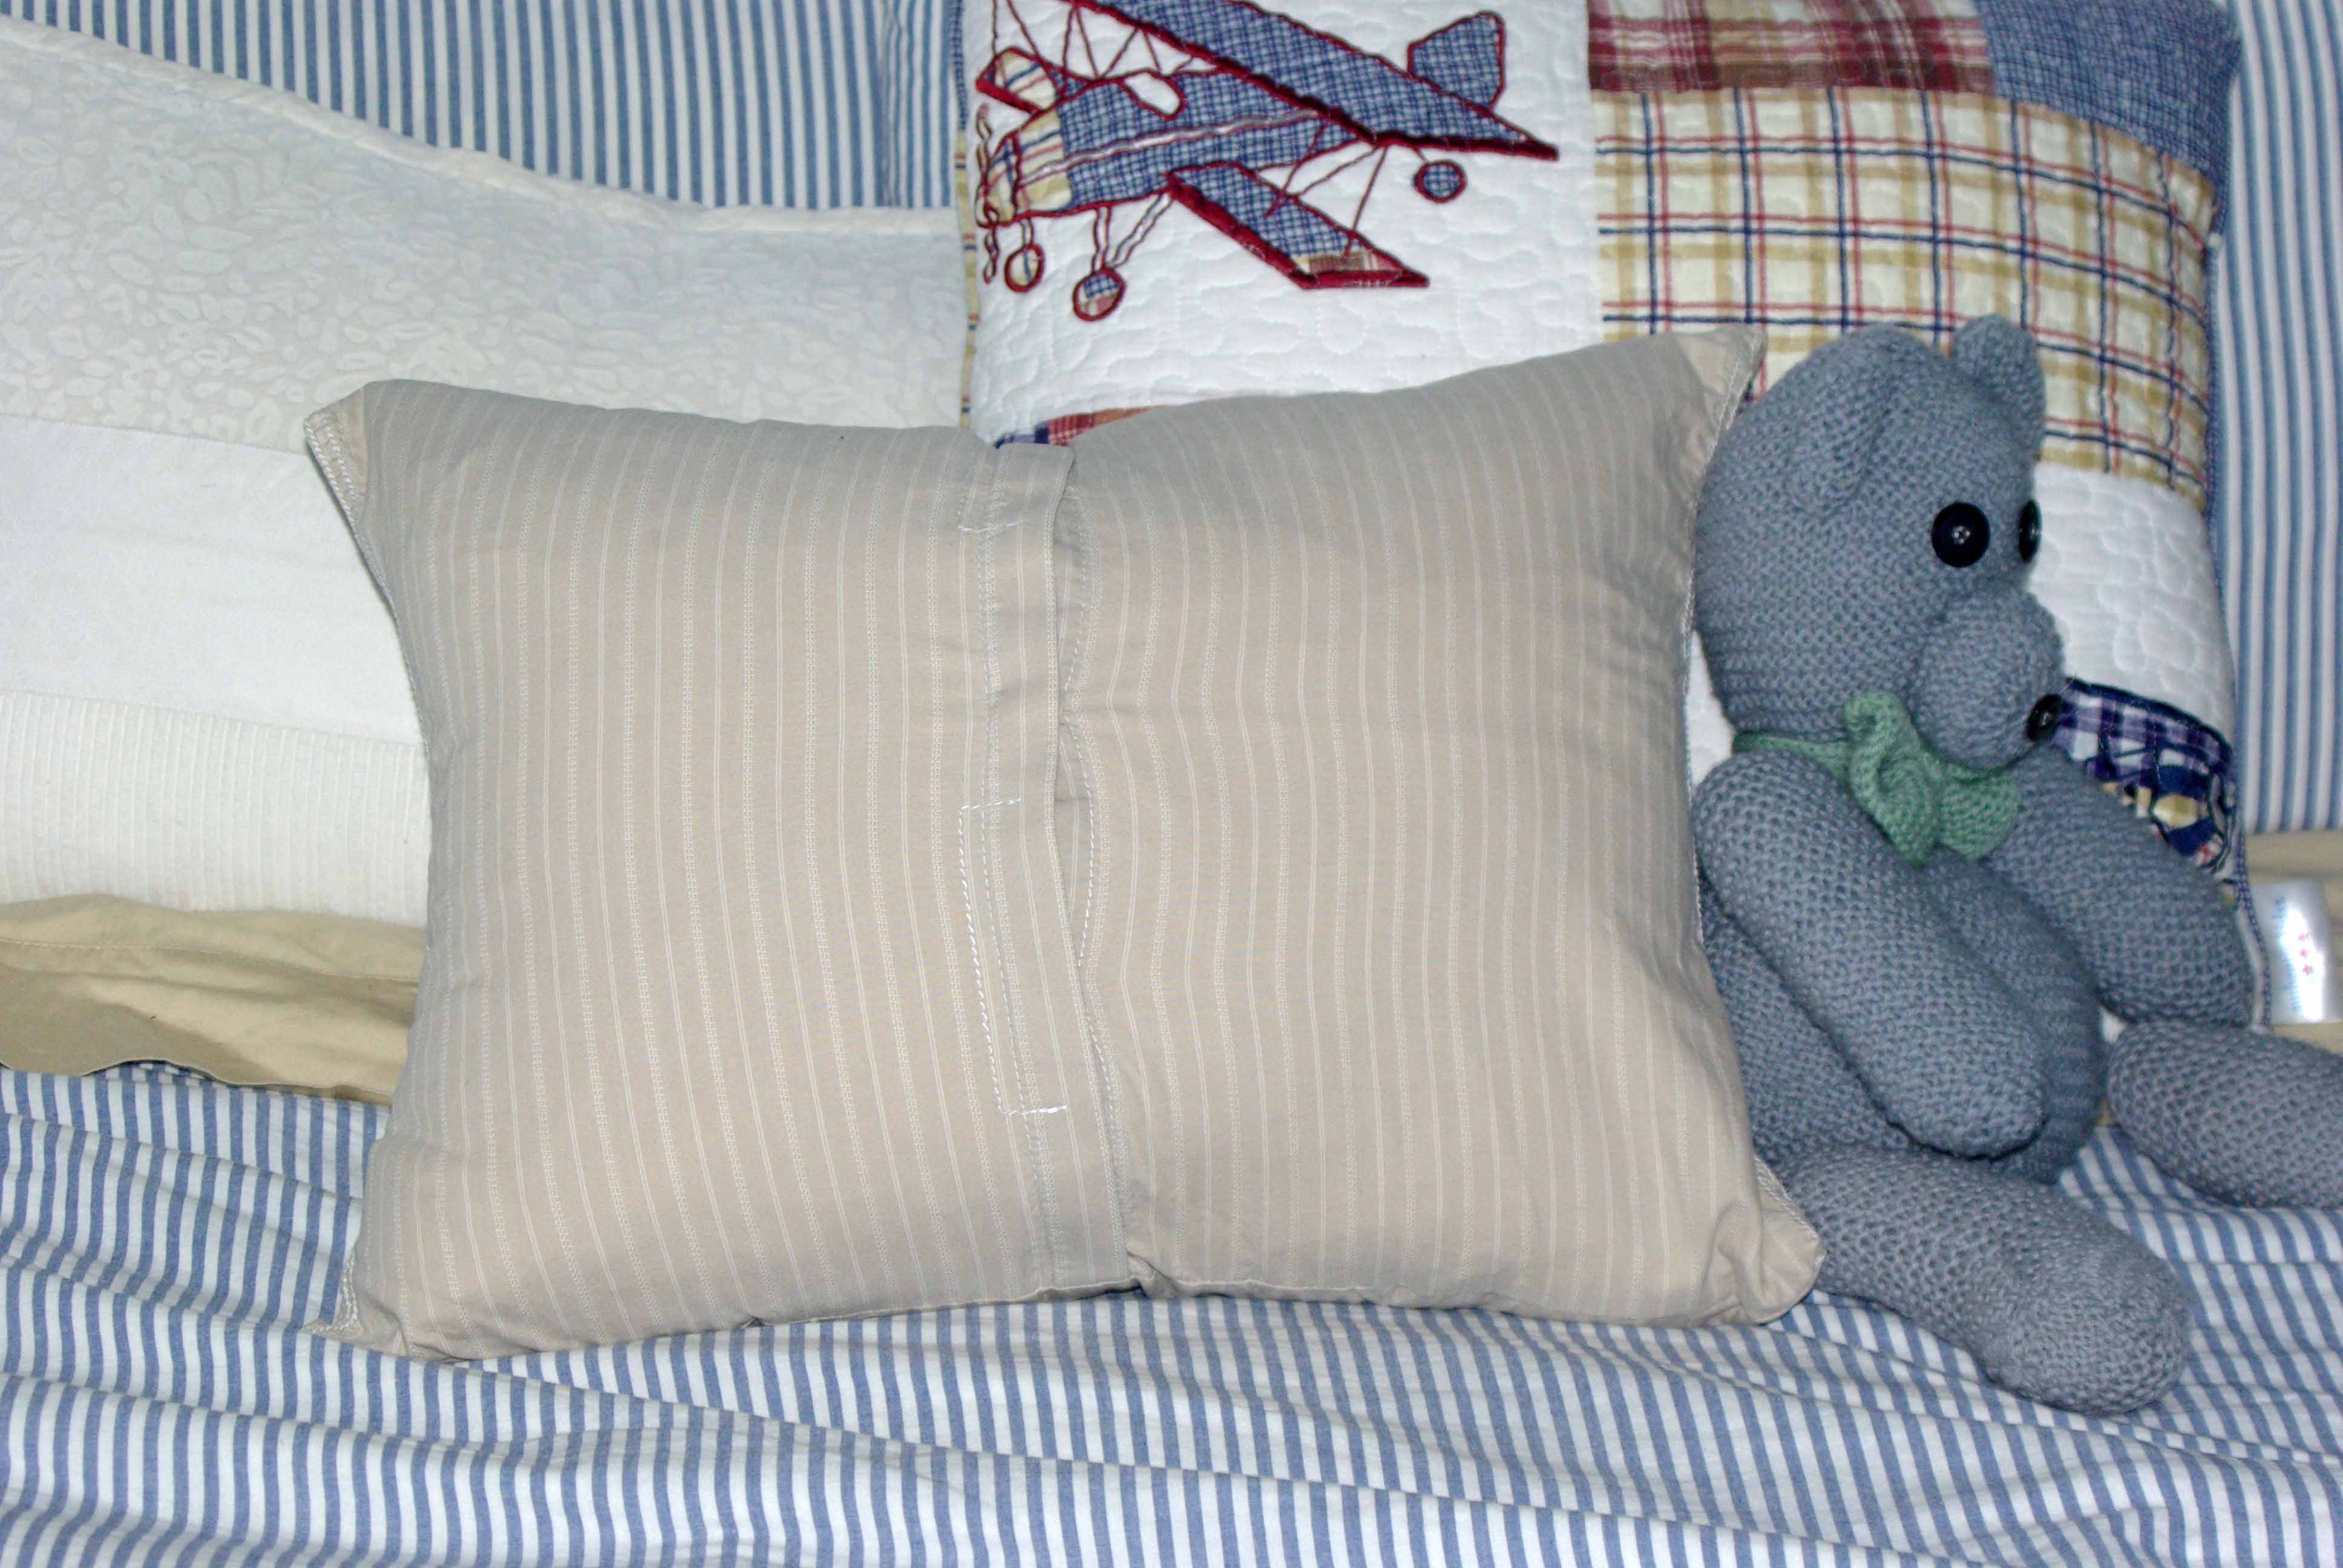
I had my sewing machine out last night, and no good can come of that. I have no idea why I think it’s such a big deal to get out a sewing machine, but once I have it out I must make those projects that I have been planning that require it. A while ago I saw a picture of a pillow made of a man’s dress shirt. My thoughts after seeing the picture were a little morbid, I though what a great idea for someone who has just lost their husband, partner, or loved one. It doesn’t have to be quite so morbid though, maybe it would be useful if you are in a long distance relationship, or have a partner that travels a lot, or maybe I have totally lost my mind. Or for the environmentalist, what a great way to recycle clothing. I will leave the judgement up to you. My husband’s comment was “Seriously don’t we have enough pillows”. He does have a point I couldn’t argue with, but seriously what’s one more? In case you can’t figure out which one is the dress shirt pillow in the picture above, it’s the beige one. It is a little boring, but everything can’t be flashy.
On the bright side, this was the fastest easiest pillow I have ever made. And FREE, who doesn’t love free.
Step 1. Start with a men’s button dress shirt, I asked my husband nicely and he gave me an old stained one. That’s true love, isn’t it.
Step 2. Iron the shirt (if you are lazy, just iron from the arm pits down)
Step 3. You do need a pillow form, or an old pillow you want to recover. Put the pillow into the shirt and check the size. For the one that I made I used a FJADRAR 20″x20″ pillow from IKEA. The instructions below are based on the 20″ pillow form and a men’s medium dress shirt.
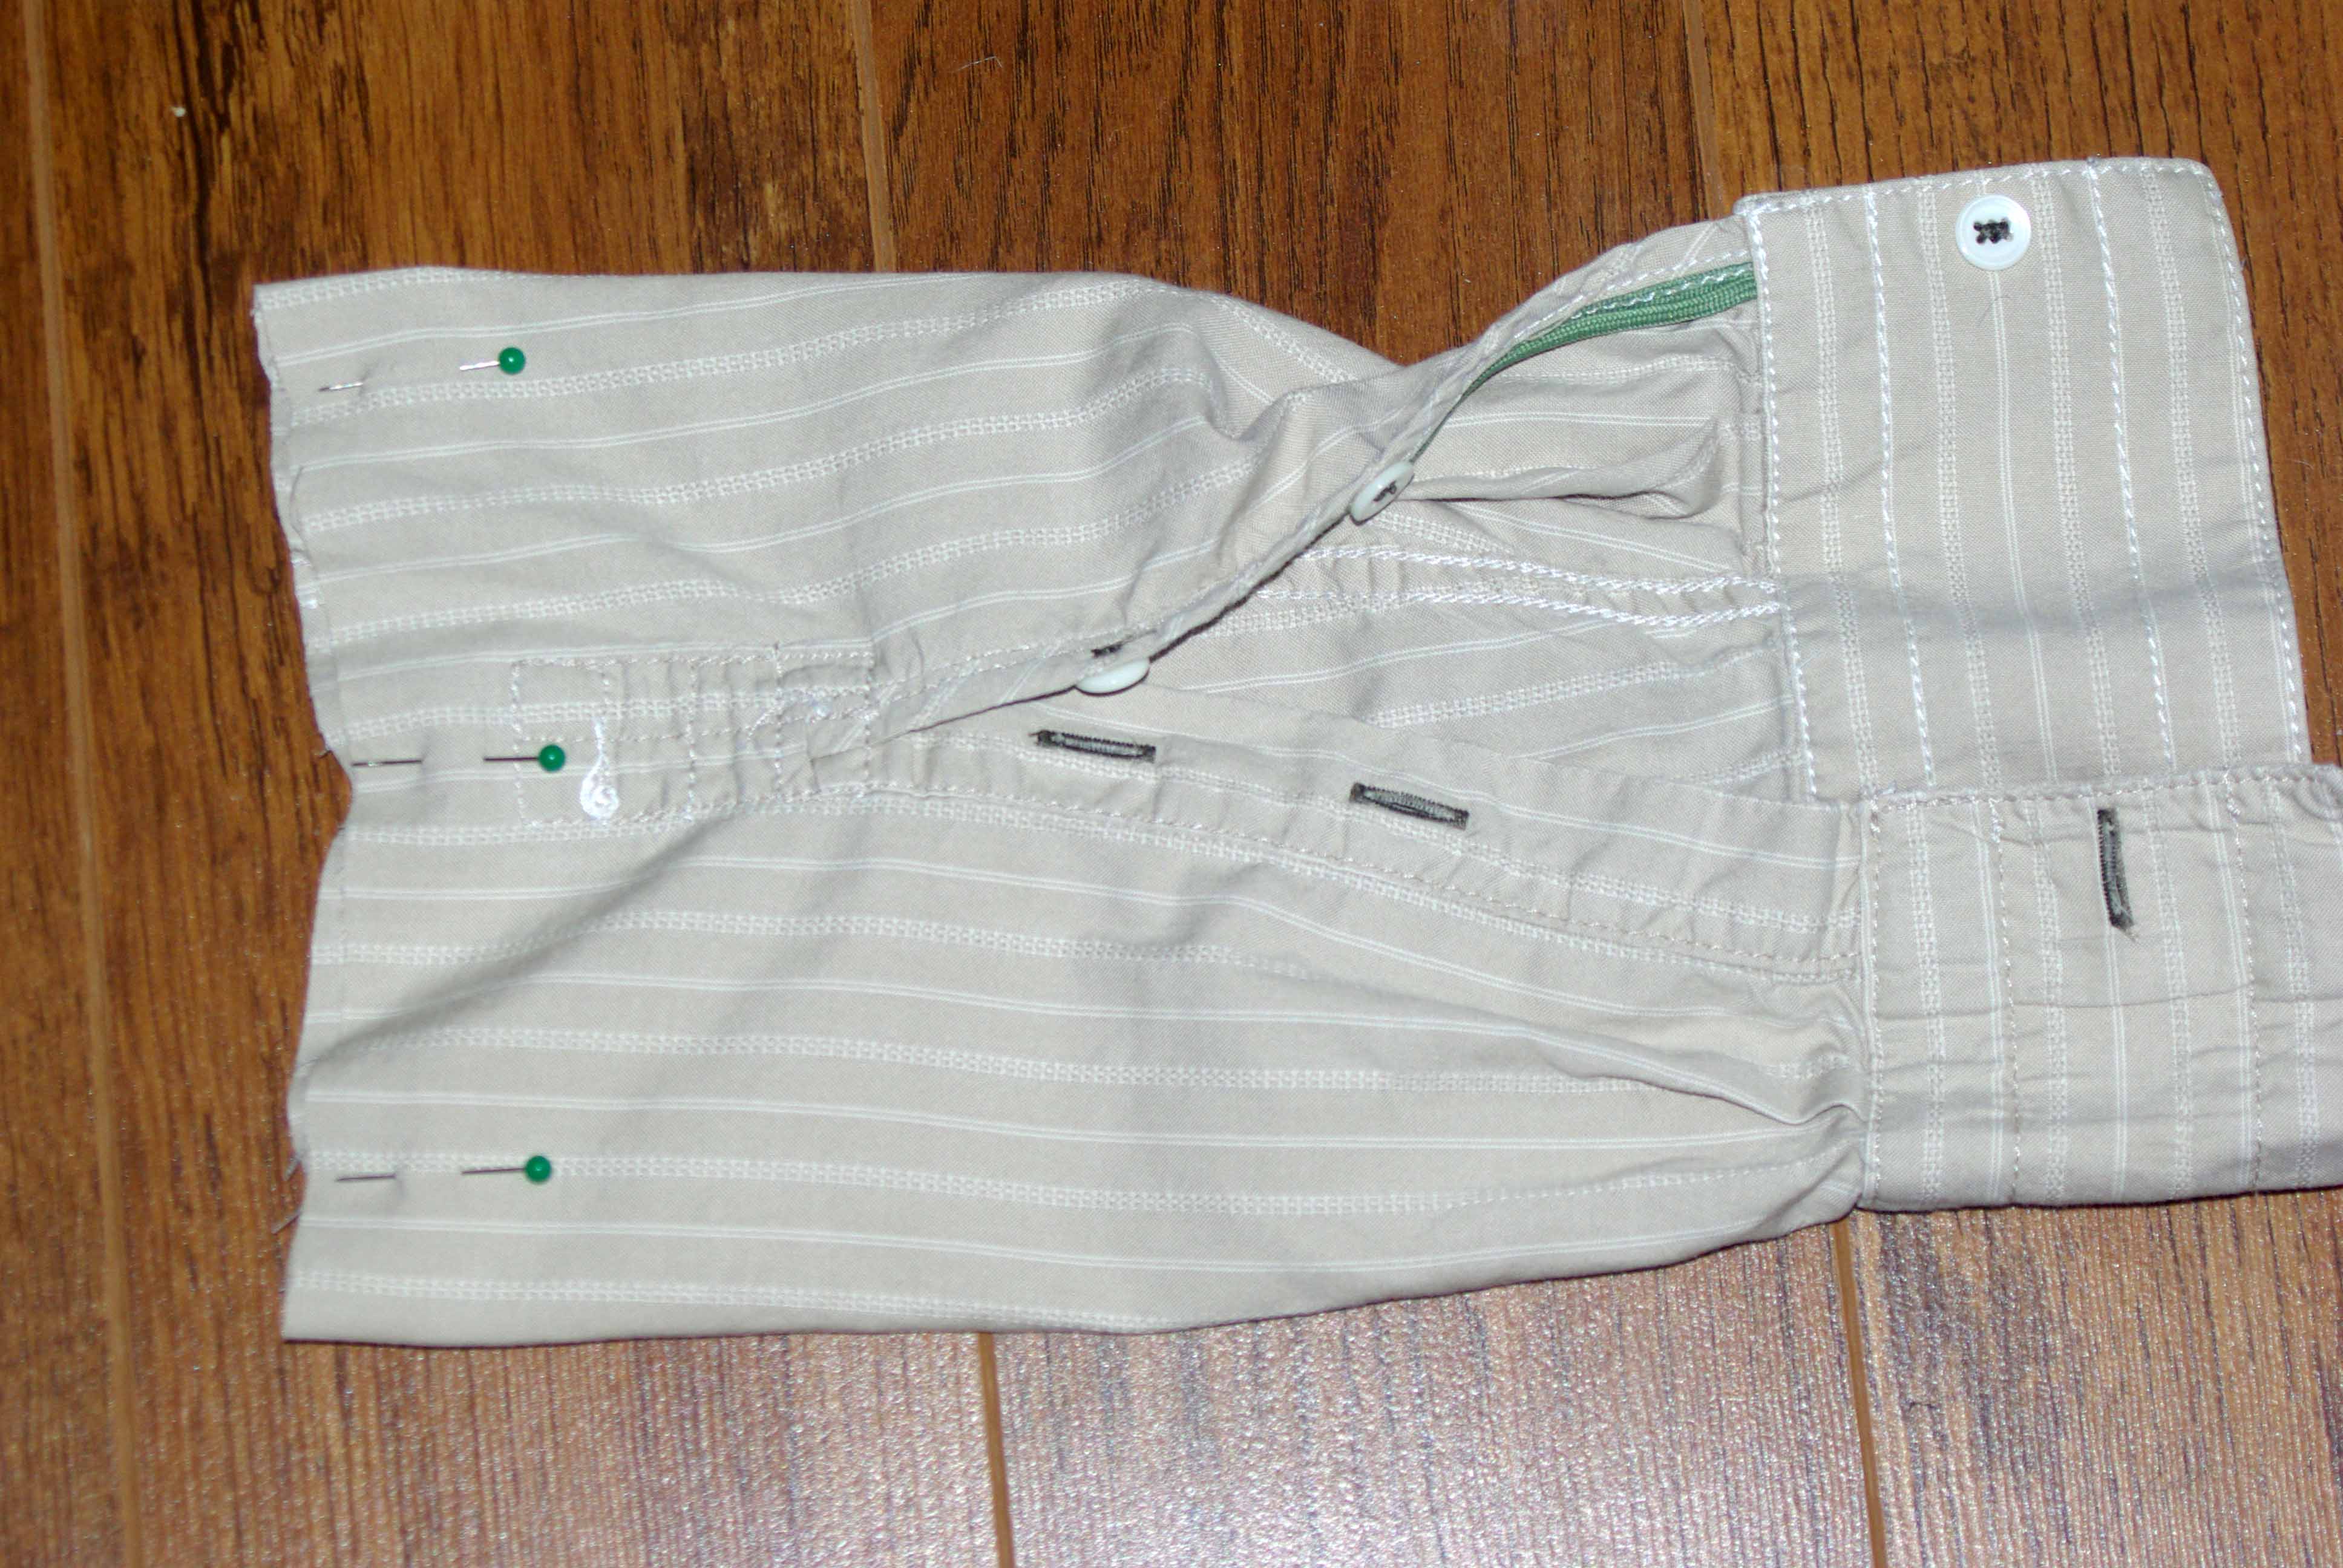
 Step 3. Lay the shirt on a flat surface and using a straight edge mark a line from arm pit to arm pit, you can use chalk to make a line, or pencil/pen lightly. If you want to get super fancy, you can mark the cut lines to make sure the button’s are symmetrical. Cut along the line you marked.
Step 4. Trim the bottom of the shirt to be parallel with the line you just cut. All you want to do is square up the bottom edge, usually the bottom edge of dress shirts is not straight.
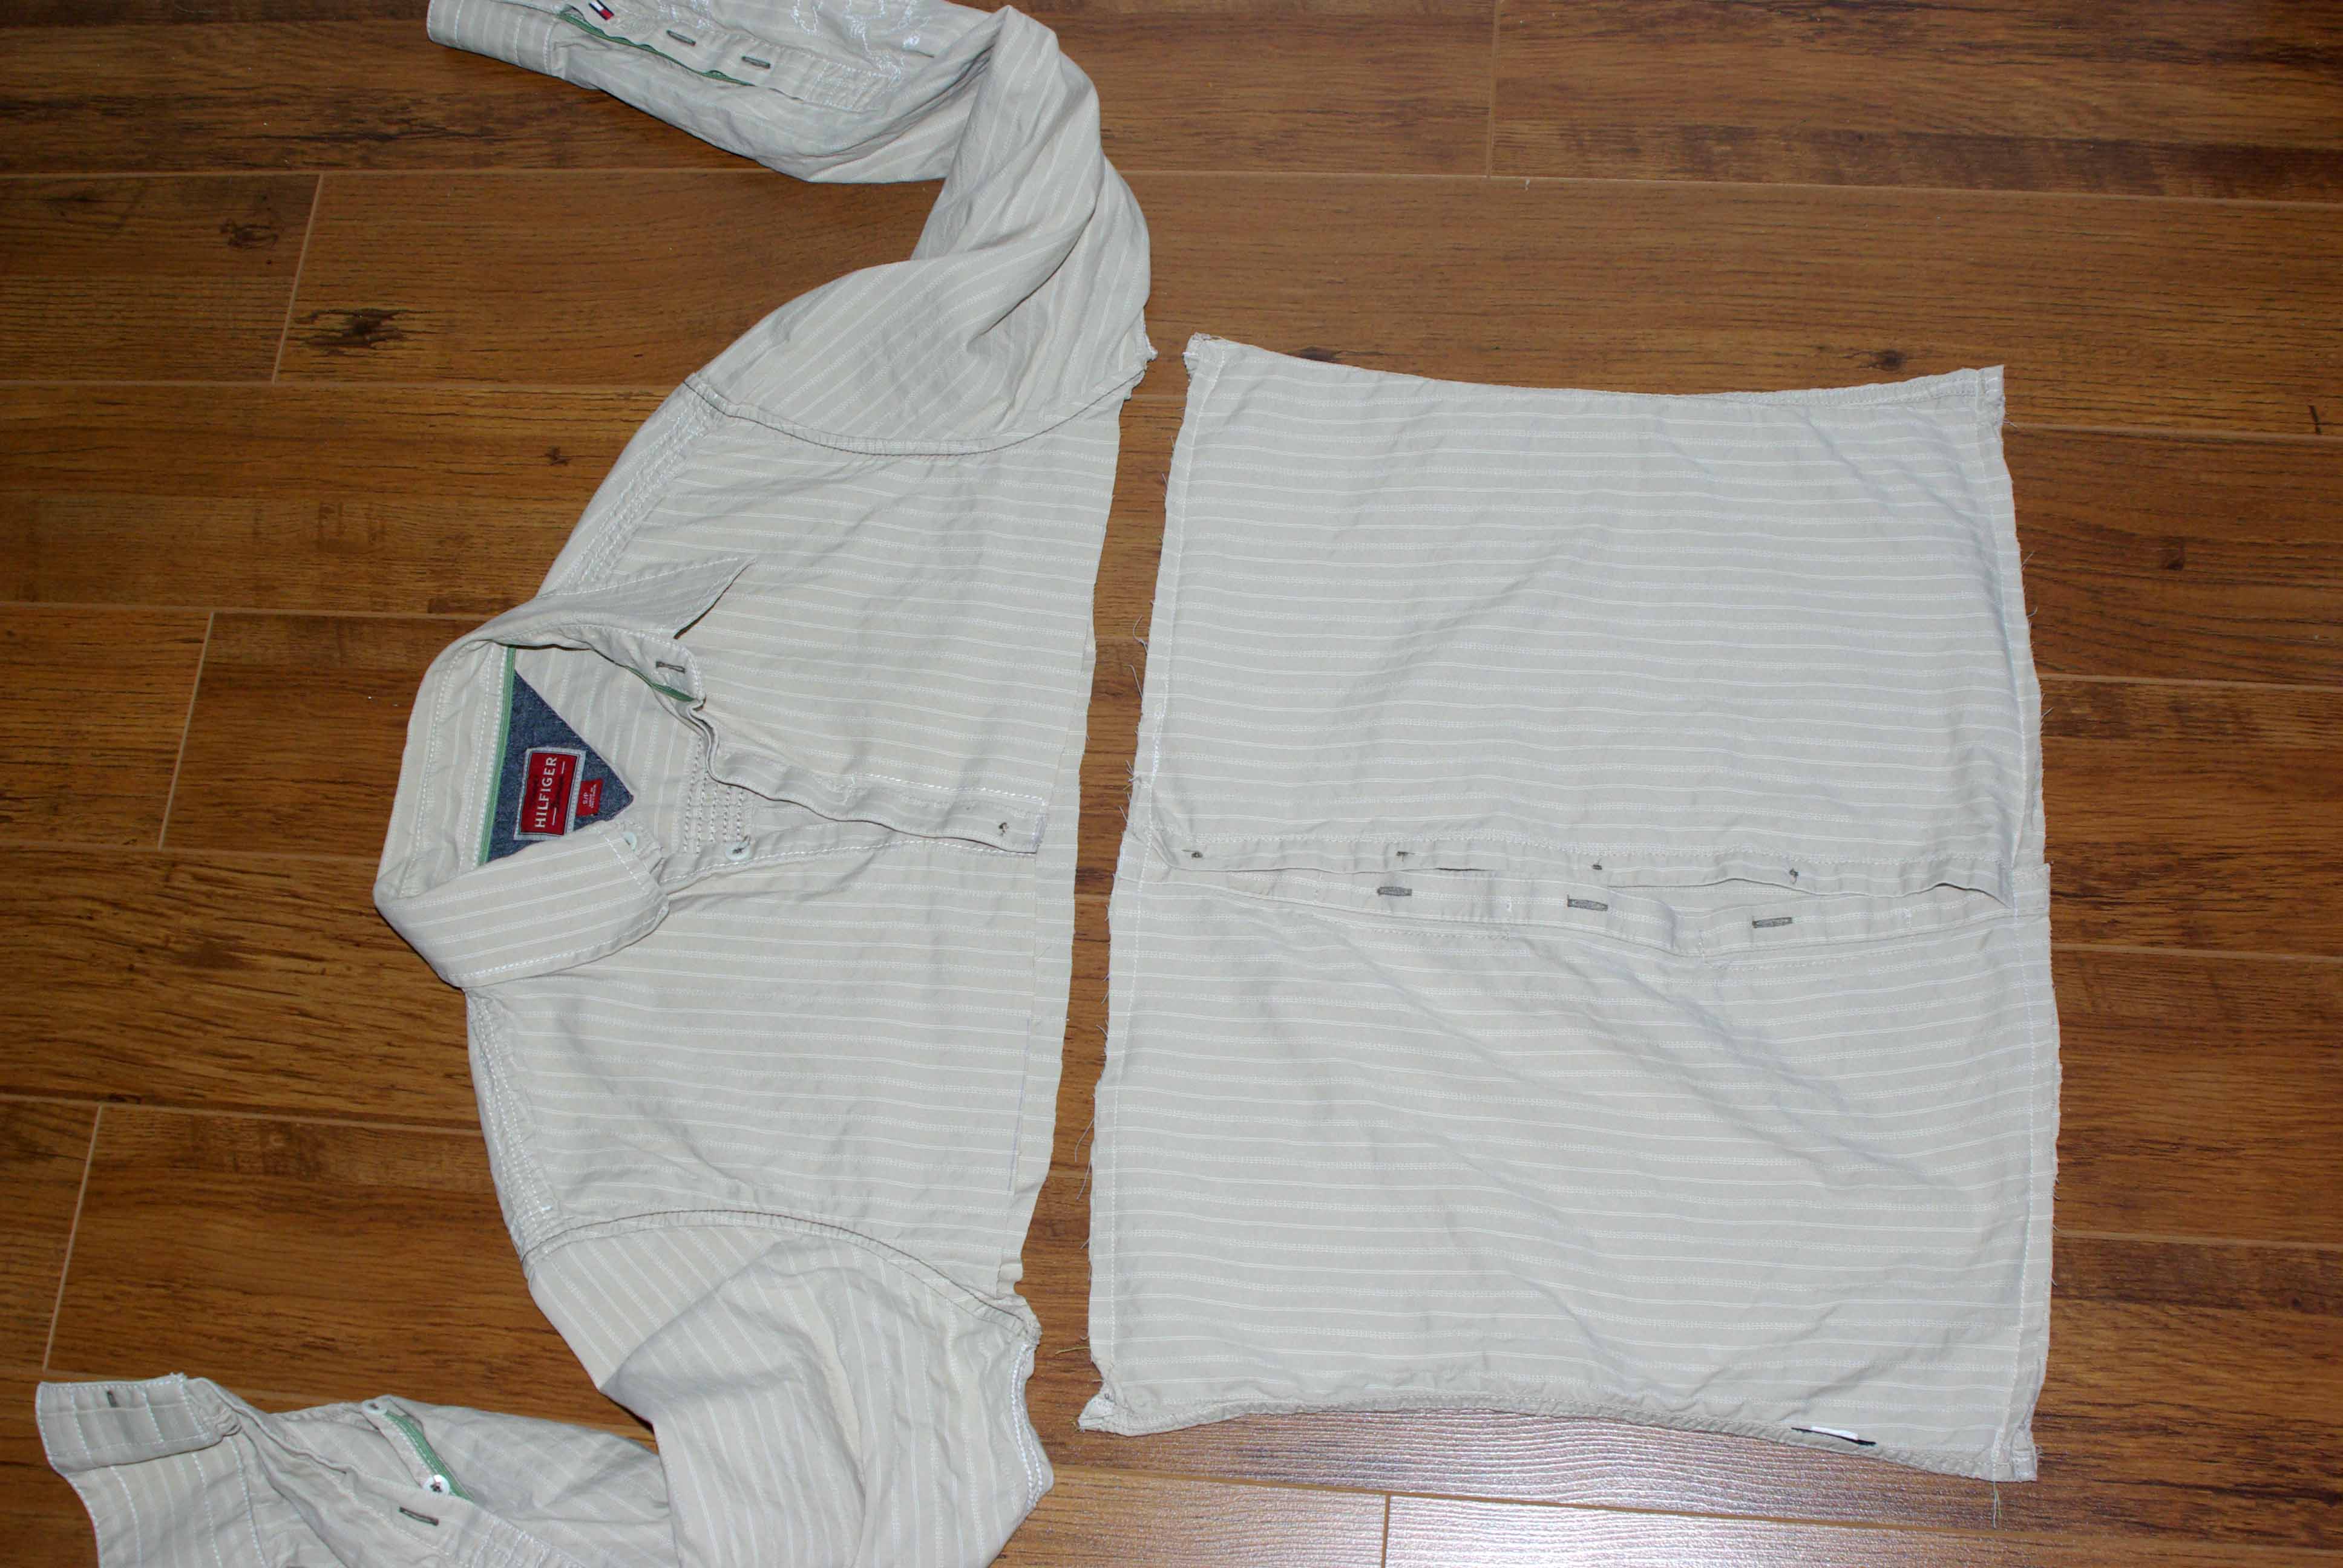
Step 5. With all of the button’s fastened, turn the piece of the shirt you cut off inside out. Pin the 2 open edges. Sew the edges closed.
Step 6. Open the button’s. Stuff with the pillow and fluff it up.
So now what do we do with the rest of the shirt? Great question, I will show you how to make something with the sleeves tomorrow. Crack out the wine, you are going to need it.
Keep sewing, crafting & creating.